Friday, July 29, 2011

Figuring out this blog thing

As you may have noticed I finally got around to figuring out how to change some things around here. Let me tell you, being in touch with my technological side is not my strength. I feel this is a major accomplishment!

The most obvious change is I swapped out one of Google's generic background pictures to one of my photos. It is a little wonky when it duplicates itself as you scroll down but let's take things one step at a time.

The other thing I took a little time with is playing around with iphoto on my computer and enhancing my photos. Wow-doggie it makes a difference! What a fun feature. I clearly have no idea what I am doing here but again one step. Maybe I'll pick up a book to thumb through about all this business.

In case you are wondering the photo was taken while on a recent vacation to Virginia and this was the "summit" of Humpback Ridge in the Blue Ridge Mountain.

Check out some other photos from that hike.


Isn't it beautiful? We really had the best day for this hike as well. I really do love summer.

Happy Weekend!

Thursday, July 28, 2011

Tabbouleh

Do you ever have a strange craving for something that you don't really eat or think you like? Anyone, anyone? Just me - cool just checking.

Well that's what happened with me and Tabbouleh. I had tried it a few times and found the flavors to not meld well in my mouth. I didn't care for the commanding flavor of the mint sprinkled throughout. Naturally, I've been craving this. 

Step one: look up recipes for "Tabouli" ----> notice the incorrect spelling. This is key. 
Step two: find few recipes of help. Even epicurious.com was unhelpful. Humph. 
Step three: buy some bulgur wheat and wing it. 

Let's start with the finished product and work backward


Turns out this experiment without meaningful and/or helpful directions turned out really well!

Here's how I did it. 


Start with some of these.


Soak some of these. Actually, this is my favorite part. I put on the teapot and soaked the bulgur for 30 minutes or until I remembered them and they looked puffed and were enjoyable to eat. 


Dump in some fresh veggies. 


Dump in as much parsley as you can stand or a whole bunch. 

Mix up a quick and lemony vinaigrette.


Voila! Let me tell you this is so good. I love it. I've surfed around the web once I figured out the real spelling and found there are so fun things I could add next time, most notably cumin. Also traditionally mint leaves are part of Tabbouleh but that's not my thing but feel free to go for it. 

Amy's Tabouli or Tabbouleh Recipe
Yields: a lot!

Ingredients

2 cups dried bulgur wheat
2  cups very hot water
small bunch of sliced scallions
1 cup diced cucumbers 
1 cup diced tomatoes 
1 bunch parsley 

Simple Lemon vinaigrette
1/4 cup lemon juice
1/4 cup red wine or apple cider vinegar 
2 tablespoon extra virgin olive oil
pinch of salt and pepper 

Soak bulgur wheat in very hot water for about 30 minutes. 
Meanwhile, chop vegetables and set aside. Whisk vinaigrette. 
Toss vegetables, parsley and vinaigrette into bulgur. 
Cover with plastic wrap over salad to help prevent drying out.

Enjoy! 


Monday, July 25, 2011

Beet Try Number 1

This week we got a fresh batch of beets in the good ol' CSA. As you know beets and me aren't bff's 4ever. But, I am game to keep trying. I read somewhere, or at the very least had a dream about, the "fact" that it takes between 12-20 exposures for kids to warm up to certain foods. Since I'm roughly three four times the age of small children. Does that mean I need to expose myself to things even more? Hmm points to ponder.

Here's the reason for my perseverance.  One: they are pretty when prepared. Two: I could use more purple in my diet even though I eat blueberries around 4-5 times a week. Three: If the beets win then the earth will fall off its axis.

I. will. win.

I found a recipe for Candy-Striped Beet and Carrot Slaw. Follow the link for the recipe.

Only, I substituted lemon and lime juice instead of the orange because they are out of season and therefore look terrible in the grocery store. Also, I forgot the dill. Ok so this isn't starting out great. BUT! I did practice my knife skills while julienning carrots and beets - score!

Here are the results

Look, pretty! 

The verdict: blech. No dice. It wasn't terrible but I would characterize this salad as edible. We can do better!

Additionally, Joel said he liked it but it sort of tasted like dirt. SEE! Beets taste like dirt!

I will prevail!

Tootles.

Sunday, July 24, 2011

Chocolate Zucchini Bread

As promised here is the second posting of the day.

This recipe is amazing. It's moist and really satisfies a chocolate craving while also adding a new twist to a perennial favorite: zucchini bread!  I stumbled across this little gem last summer and it's been in my recipe box ever since. It happens to be whole wheat and low-sugar if you're into that sort of thing. But really, the real star is the chocolate and zucchini.

The cast of characters


I was thrilled to bits because I used the very last drop of the left over low-fat buttermilk in the fridge! Joel is really rubbing off with his "waste not, want not" mantra. He's so proud.  Also, please note there is more here then really needed because I doubled the recipe so we could freeze half (and to use the remaining buttermilk).

Start by breaking the eggs then whisk in buttermilk, oil, brown sugar, splenda, and vanilla.


Grate the zucchini and add to wet ingredients. I generally add a bit more zucchini than the recipe calls for because I love them and I love super-moist bread.


In a second bowl, stir together the dry ingredients.


The original recipe suggest you fold the wet ingredients into the dry. I scoff at that suggestion.  Ok, actually I just had the wet ingredients in the larger bowl and therefore folded the dry ingredients into the wet. I could not tell any issue in the finished product. But feel free to follow the original directions.


Spray a bread loaf pan or muffin pan OR both like me with a double batch.  I used an ice cream scoop for the muffins and just dumped the remaining into a bread pan.


The original recipe indicates the bread yields 12 servings so I made 12 muffins. As you can see these are pretty full so this could have made more than 12 muffins.

Pop into preheated oven until toothpick comes out clean.


Everyone knows that muffin tops are the best part!

Chocolate Zucchini Bread
Adapted from Kalynskitchen.com

Yields 12 servings

Ingredients

2 eggs

1 cup Splenda
1/3 cup brown sugar
6 T grapeseed oil or canola oil
1 tsp. vanilla
1/4 cup low fat buttermilk
1 1/2 cups grated zucchini
1 cup whole wheat flour
1 tsp. baking soda
1/4 tsp. baking powder
1/2 cup unsweetened cocoa powder
1/4 tsp. salt


Directions

Preheat oven to 350. Spray bread loaf pan or muffin tin with non-stick spray.

Whisk together: eggs, buttermilk, brown sugar, splenda, oil, and vanilla. Add zucchini and set aside.
In second bowl stir together remaining ingredients.
Gently stir together wet ingredients into dry ingredients until just combined (or vice versa if you're feeling frisky).  Do not over stir.
Pour mixture into pan and bake until toothpick comes out clean.
Let cool and enjoy!

Cooking time: 45-50 minutes for loaf pan and 22-25 minutes for muffins.

Kale Chips

I've been a slacker (or as I once misspelled in college and have yet to live down, slaker) lately on the posts. I have actually been cooking quite a lot but I have been too busy to then post the good to the blog. So I'm going to double-post today!

Winner, winner. Chicken dinner!! 

Chicken dinner candy? Who knew!

Anywho, we've gotten kale almost every week in our CSA. Now I like kale as much as the next gal but really combine that with about two bags of salad greens, perhaps a Boston head lettuce and often Swiss Chard and you've got a lot of green leafy veggies every week. So we've been eating a lot of kale chips which is fine with me because they are addictive. 

I'm not showing you anything particularly new or unique about kale chips but let me walk you through how we enjoy them best. 


Cut the kale off the stalks. I find these to be way too tough to leave on and I typically cut the leafs in half. I drizzle a little EVOO, salt and pepper, and recently a (generous) dash of chili powder. Bake at 350 until they're pretty crispy and dried. These took about 25 minutes. 

Don't mind the blurry photo :/ 

I think they are super crunchy and actually really satisfy my craving for chips. Also they are greens so you know they are much better than a potato chip. 

I made this batch when Joel was out for a run. When he returned he asked where the whole batch was. Oops, I ate a quarter... 

ok a third....

OK HALF the batch as soon as they were out of the oven before he got home. I told you addicting. 

Betcha can't eat just one! :)

Tuesday, July 19, 2011

Banana Ice Cream - No Ice Cream Maker Necessary

People - did you know yesterday was National Ice Cream Day! Well, actually I didn't know either but thanks to signing up for every stupid email list in all the land I was kindly notified by Self.com. As soon as I got the news I thought, hey I am all over that business!

Here's something you may know about me - my undying love for soft serve ice cream. However, in an effort to reduce rather than expand my waist line I decided on making this fabulous treat instead of making a b-line to Scoops to get a twist with chocolate sprinkles.

So let's start with some of these


Well actually frozen bananas but I didn't think they would look right in the photo. So freeze these or better yet keep a supply of these frozen in the freezer. There are so many fabulous things you can make with these little things, hello Green Monster! More on that another day.

Ok next step - do a little of this


Oh bother, this isn't looking good. It's a clump of frozen lumpy bananas. Hmmp.

This is not the time to give up people! Keep going.

 
Oh we're getting somewhere! Not good enough; onward and upward...


Fabulous! Just from frozen bananas. Now, you could stop here and enjoy this and it would be delightful. Here's the thing though I was crazing something a little more. Luckily, earlier in the day I picked up a secret ingredient.


That's what I'm talking about.

I plopped in 1 tablespoon and zipped it around.


Is it just me or does that look like mint chocolate chip ice cream with the bits of nutella specks.


I've made this a few times sometimes in the food processor and sometimes in a blender. Use what you've got but they are both beastly and takes patience. You'll need to scrap the frozen chunks into the blades. I actually prefer a blender; it's a bit quicker.

For two servings I generally use two frozen bananas and in this case 1 tablespoon of Nutella and it was the perfect ratio. Instead of Nutella  I have put in a tablespoon of baking cocoa powder and a tablespoon of peanut butter and that is really delicious as well. Really, just go crazy with this people it's a great treat!

Enjoy!

Monday, July 18, 2011

Whole wheat buttermilk pancakes

How was everyone's weekend? We had a wonderful time at a wedding this weekend.  Wowsie did the bride look beautiful and they had the most darling cupcakes- particularly the cannoli cupcakes - yes you read that correctly cannoli cupcakes. Finally, we had a great time dancing and cheering on the groom and groomsmen as they did the dance to the YMCA song.

The next morning, I was ready to roll up my sleeves and get back into the kitchen.  I've been staring at the remaining buttermilk I have in the fridge thinking about how best to use it for the past week. As you know I don't deep fry so that was out of the question. In the past, I've made delicious salad dressing using buttermilk as a base but I wasn't feeling that either. Then I remembered we had real maple syrup - hello perfect set up for pancakes!

I did a little digging and there were some delicious looking recipes for buttermilk pancakes. However, I settled on a cooking light recipe because even if I'm going to indulge I can still do it reasonably.

Let's get started.


Coffee is, in fact, a requirement for this recipe. First, I combine the dry ingredients but I'm a bonehead and didn't take a picture of this. You've seen that before, so moving on.

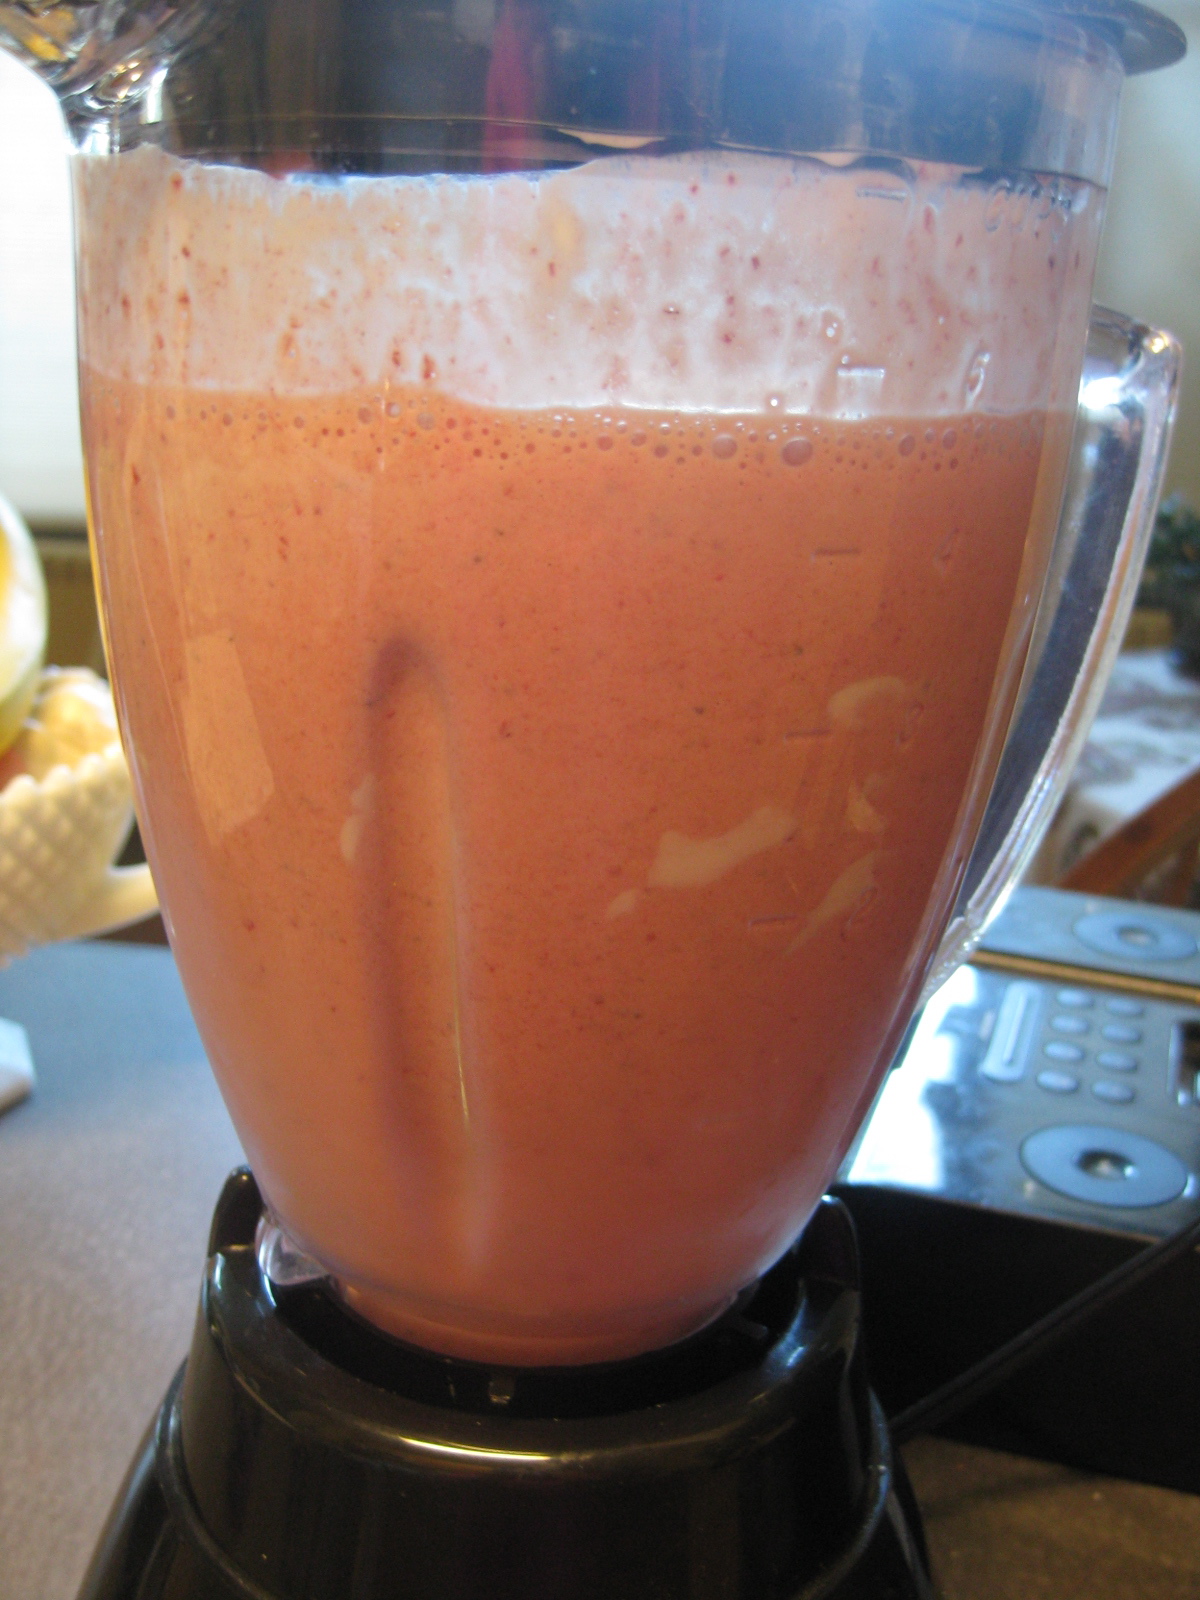
Whisk up the wet ingredients.


Taking an "action shot" with one hand is difficult. The end result looks like the beginning of quiche, hmm that would be good. Ok a post for another day.


Dump wet ingredients into dry and stir until just combined. We're ready to cook them up!


Don't mind the blurry photo on top I wanted to show you that I used a small ice cream scooper to make even and adorably small pancakes. When you're finished cooking them up it's time for toppings!


People pay attention! This is getting exciting! Naturally I did not serve Joel any butter but a little goes a long way, unless you're Paula Dean (love her!).

My plate.


And Joel's


Walnuts sound good, no?

Now if you aren't convinced that whole wheat pancakes are your bag let me assuage your fears. The whole wheat gives the pancakes a wonderful depth and nutty flavor. They were so good and freeze well, we wrapped the left overs in wax paper and freezer bags. After we carbed-up we went into the heat for a two hour hike on the Finger Lakes Trail.  I hope everyone had an equally delicious and fantastic weekend.

Whole Wheat Buttermilk Pancakes
Adapted from Cooking Light

Yields 6 servings

Ingredients

3/4 cup whole wheat flour
  • 3/4 cup all-purpose flour
  • 3 tablespoons sugar
  • 1 1/2 teaspoons baking powder
  • 1/2 teaspoon baking soda
  • 1/2 teaspoon salt
  • 1 1/2 cups low-fat buttermilk
  • 1 tablespoon vegetable oil
  • large egg
  • large egg white
  • Cooking spray
  • 3/4 cup maple syrup
  • 3 tablespoons butter


Directions
Combine flours, sugar, baking soda, baking powder and salt in large bowl. In smaller bowl whisk buttermilk, vegetable oil and eggs together. Fold wet ingredients into dry until just combined.

Heat nonstick griddle and spray with nonstick cooking spray. Using a small ice cream scooper or 1/4 cup measuring cup (for slightly larger pancakes) and heat until bubbles raise to the top and then flip. Serve with butter and heated syrup.

Using the 1/4 cup measuring cup serving size is two pancakes and using the small ice cream scoop the serving size is 3 small pancakes. Nutritional information includes 2 tablespoons maple syrup and 1 1/2 teaspoons of butter.

Enjoy!

Check out the Cooking Light website for the full nutritional breakdown.

Friday, July 15, 2011

Vegetable Lasagna

Happy Friday! I am enjoying a diet coke and a day off of work and thought this is the perfect time to tell you about a new recipe.

Each week we get an email detailing the contents of the CSA and I attempt to create a menu based on the veggies. Lately, it's been a scramble to stay on top of all the veggies, especially the salad greens! Currently, our CSA is brimming with beautiful yellow squash and zucchini. A quick epicurious.com search produced a fresh summer lasagna. Since I have the benefit of an air conditioner I had no problem firing up the oven and giving it a whirl.

The major stars (I didn't grab everything, oy!)

see what I mean about the squash?

The recipe is exceptionally easy and if I had been thinking more clearly I would have added the fresh basil I had in the fridge, doh! Not to worry it was zipped into a delicious pesto. Also, the original recipe called for roasted red pepper which I promptly forgot to pick up and lowfat goat cheese that I decided to swap with low fat mozzarella. Although I love goat cheese and am sure it would be wonderful in this  I wasn't just in the mood people.

Assembly is so easy. I couldn't be bothered to par-boil the lasagna as my dishes were already piling up the day I made this, just dump a little more sauce in there. Also, the squash hold so much water there's no need.


I actually used two smaller pans so I could pop one into the freezer for another day.


Viola! The lasagna was great and we didn't miss the ricotta that typically accompanies lasagna. Two critiques, a. I remain unmoved to parboil lasagna and create an even bigger mess but the top layer is a little crunchier than el dente - suggestions? b. I could have stood for more black olives, they were so delicious and really the amount called for is not enough.

Vegetable Lasagna
Adapted from a Self recipe

7 oz. low fat mozzarella cheese
1/3 cup pitted black olives
1 Tb. chopped fresh thyme
1/2 Tb. dried basil
1/2 Tb. dried oregano
2 tsp. minced garlic
4 cups prepared pasta sauce
1lb whole-wheat lasagna
2 small zucchini (mine were more like large), diced small
2 small yellow squash (ditto here on the large), diced small
3/4 cup roasted red pepper
1/4 cup parmesan
Salt and pepper to taste

Preparation
Preheat oven to 375. Mix first six ingredients in bowl, season with salt and pepper and set aside. Spread enough pasta sauce to cover the bottom of a 8 x 11 baking pan, or two smaller if you want to be like me. Add one layer of lasagna, add layer of diced squash and red pepper. Spread mozzarella evenly. Repeat layers and finish with lasagna, sauce and parmesan.
Cover with foil and bake 45 minutes. Uncover and finish baking for 10 more minutes or until the top browns. Let stand for 10 minutes and then serve.
Enjoy!

Tuesday, July 12, 2011

Strawberry Sour Cream Ice Cream

As Jenn so kindly pointed out to me I have yet to post about the side board. Here's the thing, it's so close to being done - I promise to post soon. You are going to love it!

Recently I went strawberry picking and could barely keep my paws out of the good as I picked. They were so ripe and delicious. I had gotten so used to the store-bought traveled-across-the-country variety that I forgot how juicy fresh strawberries really are. Initially, Joel and I planned to pick one bucket but he was so excited that we ended up with two almost spilling over buckets. Whoops.

I was poking around the internet for a fun recipe to try out with the fruit. I adore ice cream and decided to give this recipe a shot. Obviously, I made some modifications since the original recipe called for heavy cream and the usual ice cream suspects. I'll link up to the original recipe should you want the full fat option.

Here we go, diving in.


Start with one pound strawberries. I fudged and added slightly more than a pound because I'm a rebel like that.  Macerate in sugar and vodka. Because the fat content is so low in this ice cream vodka helps so that it doesn't freeze into a strawberry ice block. Vodka = good. 


In the meantime combine the remaining ingredients. I lightened the recipe and used light sour cream, fat free half and half, low fat buttermilk and lemon juice. Yes maybe I should have used fresh lemon juice but I didn't have any on hand. 


Dump into blender and zip together. I suppose you could then strain it to take the seeds out. Honestly, that's not going to happen on my end.


After a quick trip into the ice cream maker - voila! Doesn't it looks fantastic?

It was a huge hit!


Strawberry Sour Cream Ice Cream
Adapted from Confections of a Foodie Bride that adapted the recipe from the Perfect Scoop

Yields 8 servings

Ingredients 

1 lb strawberries, hulled and roughly chopped
1 Tbsp vodka or kirsch
1/4 cup sugar
1 cup  light sour cream
1/2 cup fat free half and half
1/2 cup buttermilk
2 Tbsp lemon juice


Macerate strawberries, vodka, and sugar for an hour or overnight. 
Stir remaining ingredients together. Put strawberry and cream mixture in blender and blend until just together. 
Freeze in ice cream maker according to its directions. Mine needed about half an hour. 
Enjoy!


Nutritional information: Cal. 125; Fat 6.3g; Sat. Fat 3.8g; Sodium 64mg; Fiber 1.1 g; Protein 1.8g 


Here's the link to the original recipe if you'd care to check it out: Strawberry-sour cream ice cream